My Timesaver based on
THE Original by John Allen
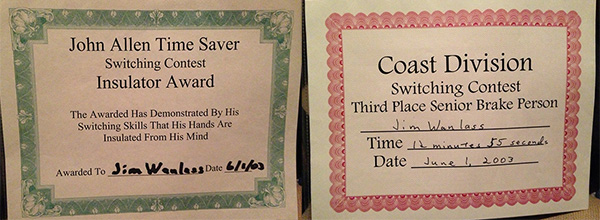
I have been wanting to build a Timesaver based on John Allen’s original Timesaver ever since I saw it at my first NMRA National Convention in San Jose in 2000. I incorporated a version of it on my shelf layout (you can see it here) but with the extra tracks and buildings it just isn’t the same as a “stand alone game” would be. On June 1, 2003 I attended, as a guest, a Coast Division meeting of the PCR, NMRA. There I won not one but two awards for the Switching Contest using a new Timesaver they had built because the originals were donated to the San Diego Model Railroad Museum and the NMRA Howell Day Museum. There were two – one built by John Allen and, another which connected together, by Bill Corsa.
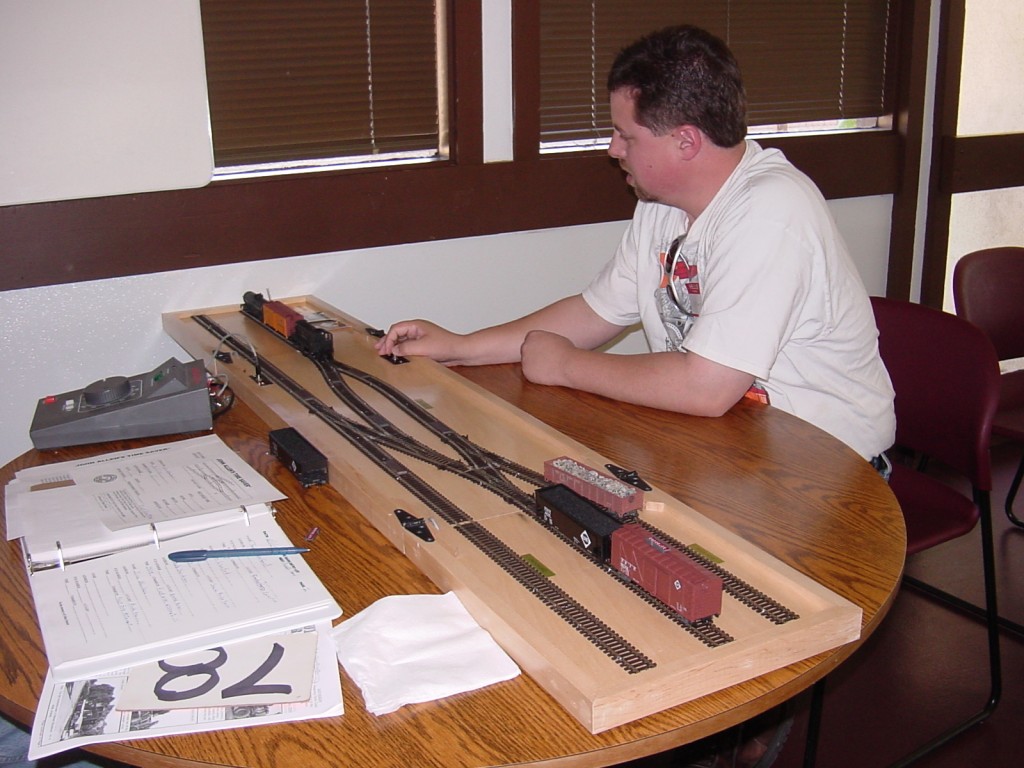
Jim learning how to run the Timesaver
I never operated on the original when I saw it in San Jose but I did take video of Allan Fenton, before he passed away, explaining the rules of the game. Allan was one of the original operators on John Allen’s Gorre and Daphetid Railroad.
When I played it at the PCR meeting I did it under 7 minutes. One of the rules is that if you do it in under 7 minutes you move up from 5 cars to 6 cars. The guy officiating the game said he has never seen anyone do it in under 7 minutes on their first try! My first award was for that. The second was for coming in Third Place in Senior Brake Person (the 6 car category). I almost didn’t even go, but I’m glad I did. It was cool!
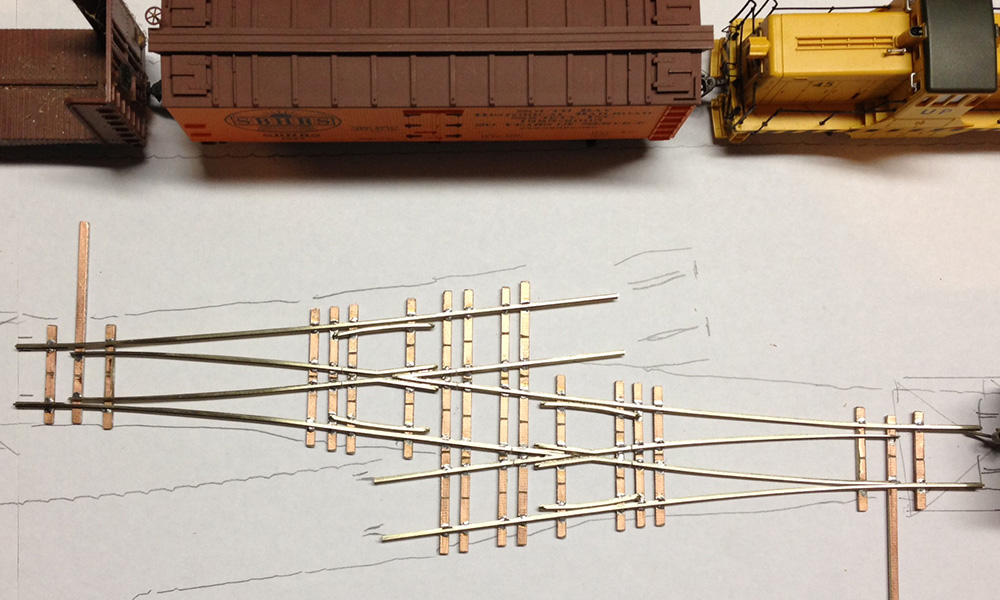
Fast forward to 2013. After helping with a couple of Railroading Merit Badge clinics, one thing definitely missing was a hands-on running trains experience for the boys. Finally it is time to stop thinking and time to start building my own Timesaver! Using a few websites and my own notes and video I’ve come up with drawings and ideas. Since I am making the turnouts myself I knew I could modify them so that I could make an extremely compact version that would make it easy to transport. One thing I remember Allan saying is that people find it wide enough but never long enough. I’m sure that is by design! I am making it so it just barely fits all the required dimensions using 40′ cars. One way John made it compact was to use wye turnouts. I made two #4 wyes really close together (as one) and shorter than normal. There will be a third wye and one #4 right hand and one left hand. Total of five turnouts all within the middle section. The “wings” will fold to make it compact. When opened it will measure 10″ x 60″ – closed a compact 10″ x 30″ and only 3.5″ thick.
In the early stages I showed my son what I was up to. He claims he does not like trains. I say he just doesn’t know that he likes them yet. At the last train show I took him to the second we got there he said he was bored and ready to leave before we even got to see a layout. He did take a few minutes to soak in all the detail on the Lego layout! You just have to know where to direct the attention according to their likes. Anyway, I explain that so you know that when he spent almost an hour with me running the train on a test track that is a pretty huge deal!
Not only am I a Merit Badge Counselor but also a Cubmaster. I plan on letting the boys have some fun with it at Den and/or Pack Meeting too. Another place to share it is at the monthly Division Events of the Northern Utah Division, NMRA. It can be run as an ongoing contest against others or just trying to better one’s own time. Many times people go to train shows or open houses and see the trains running. Usually there are not too many times you get to take control and run them yourself. I anticipate there will be many ways it can be used to share the fun of model railroading!
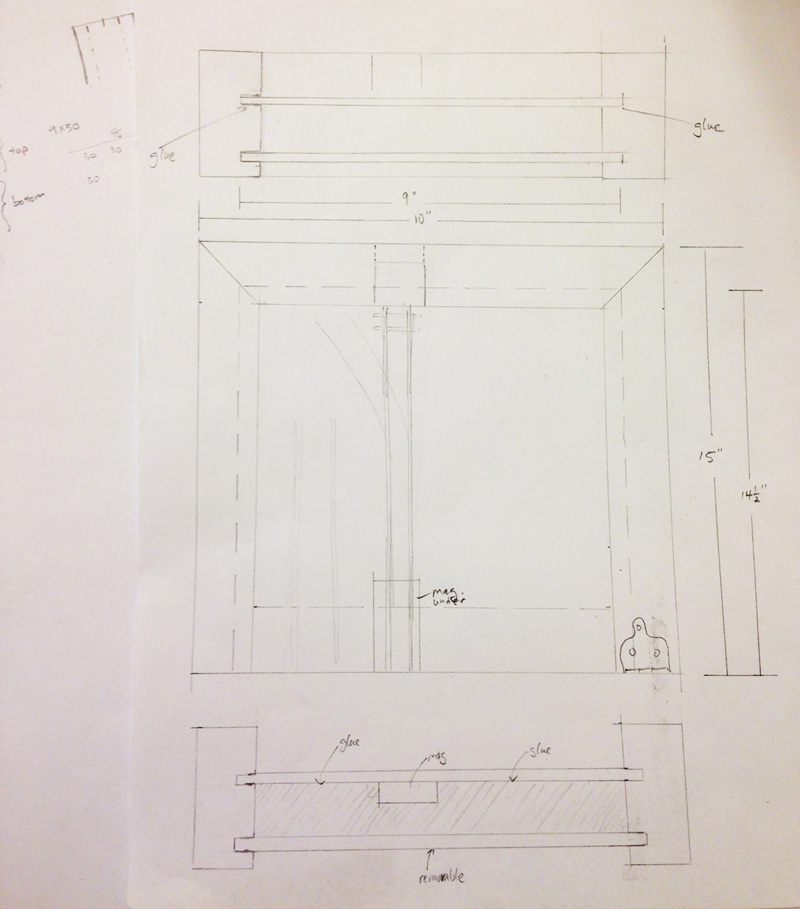
Here’s the “freehand” sketch I made of the frame. It’s quarter inch ply with a 1×2 frame. I cut two slots with the table saw for the top to be glued and stapled. The bottom one slides in and out so the wires are covered and protected yet can be accessed if needed.
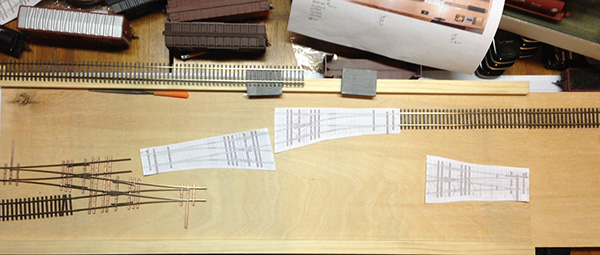
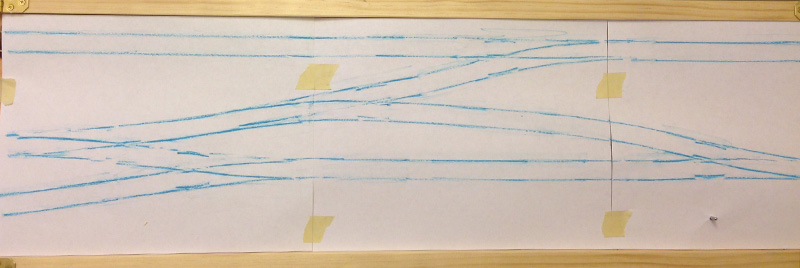
The frame/box was built and sprayed with a clear coat to protect it. Afterwards I finished all the turnouts then once in position I took some chalk and made a rubbing onto plain paper so I would know exactly where I wanted everything. I almost built another right hand #4 to replace the wye on the right because the track wasn’t lining up the way I wanted but a little more fiddling and it worked out great!
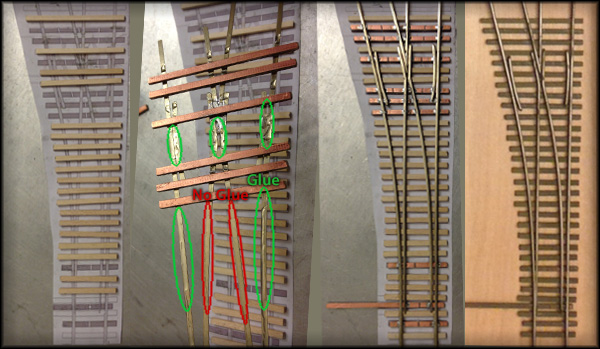
The turnouts I build need wood ties added to make them look like a “real” turnout. From left to right – long wood strips are cut to size and placed on the template in position. Super glue is added but not to the rails that need to move. The turnout is placed into position. You have a few seconds to make any adjustments then I add some weights while I let it dry for about 5 minutes. Next, the whole thing is painted with a light coat of spray paint. I move the points while the paint is drying to make sure they don’t stick. I also take a small block of wood and clean the top of the rails off before the paint dries. I use a bright boy after everything is dried to clean it up really good.
Here you can see the main part of the track plan – the sides that fold up are just straight track. After the paint is dry I’m going to solder it all as one piece (gaps are cut for the frogs) and add the missing ties and do some touch up painting. Then the track will be nailed down and feeder wires added for power. I’ve done a test of the micro switches I’m going to use to keep the points of the turnout in the correct position. They can also be used to power the frogs but the locomotive I’m using doesn’t need them to be powered, I think. We will see. I can always add power later the way I’ve designed it.
An update to this post is that I’ve been running the Timesaver with multiple Railroading Merit Badge Classes and I think it adds an important element to the class: Hands-on. That for me is a huge part of what Model Railroading is. Everyone has fun doing it. Sometimes I even run it just for fun on it’s own. I’m surprised sometimes that the younger kids often can pick it up faster than the older Boy Scouts.
It has added an important aspect to the class/workshop, it is very portable and is a lot of fun. I’m glad I built this because it is one way I can easily share Model Railroading with others and we can enjoy the journey together!

